
Parging Repair 101: How to Fix Damaged Surfaces
Introduction
Parging is a process that involves applying a thin coat of mortar or cement to the exterior surfaces of walls, primarily for aesthetic purposes and protection. If you’ve noticed cracks, chips, or other imperfections on your home’s stucco wall or masonry surfaces, it’s likely time for some parging repair. This article will delve into the intricacies of parging repair, covering everything from what parging is to how to fix damaged surfaces effectively. We’ll guide you through the steps necessary for a successful restoration and offer tips on selecting the right materials and contractors for your specific needs.
What is Parging?
Parging refers to the application of a layer of mortar or concrete over masonry walls. It serves several functions:
- Protection: It safeguards against moisture infiltration and weather damage.
- Aesthetic Appeal: Enhances the visual appeal of buildings by providing a smooth finish.
- Surface Preparation: Prepares walls for additional finishes such as paint or stucco siding.
Understanding the basics of parging sets the stage for effective repairs.
Why is Parging Important?
The importance of parging cannot be overstated. Here are several reasons why homeowners should pay attention to their parged surfaces:
Signs You Need Parging Repair
Recognizing when your surfaces need attention is crucial. Look out for these signs:
- Cracks or fissures in the surface
- Flaking or peeling material
- Moisture stains on interior walls
- Visible mold growth
Addressing these issues early can save you time and money in the long run.
Tools and Materials Needed for Parging Repair
Before diving into repairs, gather all necessary tools and materials:
Tools
Materials
Having these tools on hand makes the process smoother and more efficient.
Steps to Fix Damaged Surfaces: A Comprehensive Guide
Now that you understand what parging is and why it’s important, let’s walk through the steps needed for effective parging repair.
Step 1: Prepare Your Work Area
Before starting any repairs, it's essential to prepare your work area:
- Clear away any debris around the damaged surface.
- If painting is required afterward, consider using painter's tape to protect surrounding areas.
Step 2: Assess Damage
Evaluate the extent of damage before proceeding:
- For minor cracks, simple filling may suffice.
- Significant damages may require larger patches or comprehensive resurfacing.
This assessment will determine how much material you'll need.
Step 3: Clean The Surface
Cleaning is crucial for proper adhesion:
A clean surface ensures better bonding with new materials.
Step 4: Mix Your Parging Cement
Follow manufacturer instructions for mixing:
- Combine dry cement with water in a bucket until achieving a paste-like consistency.
Ensure that it’s mixed thoroughly without lumps.
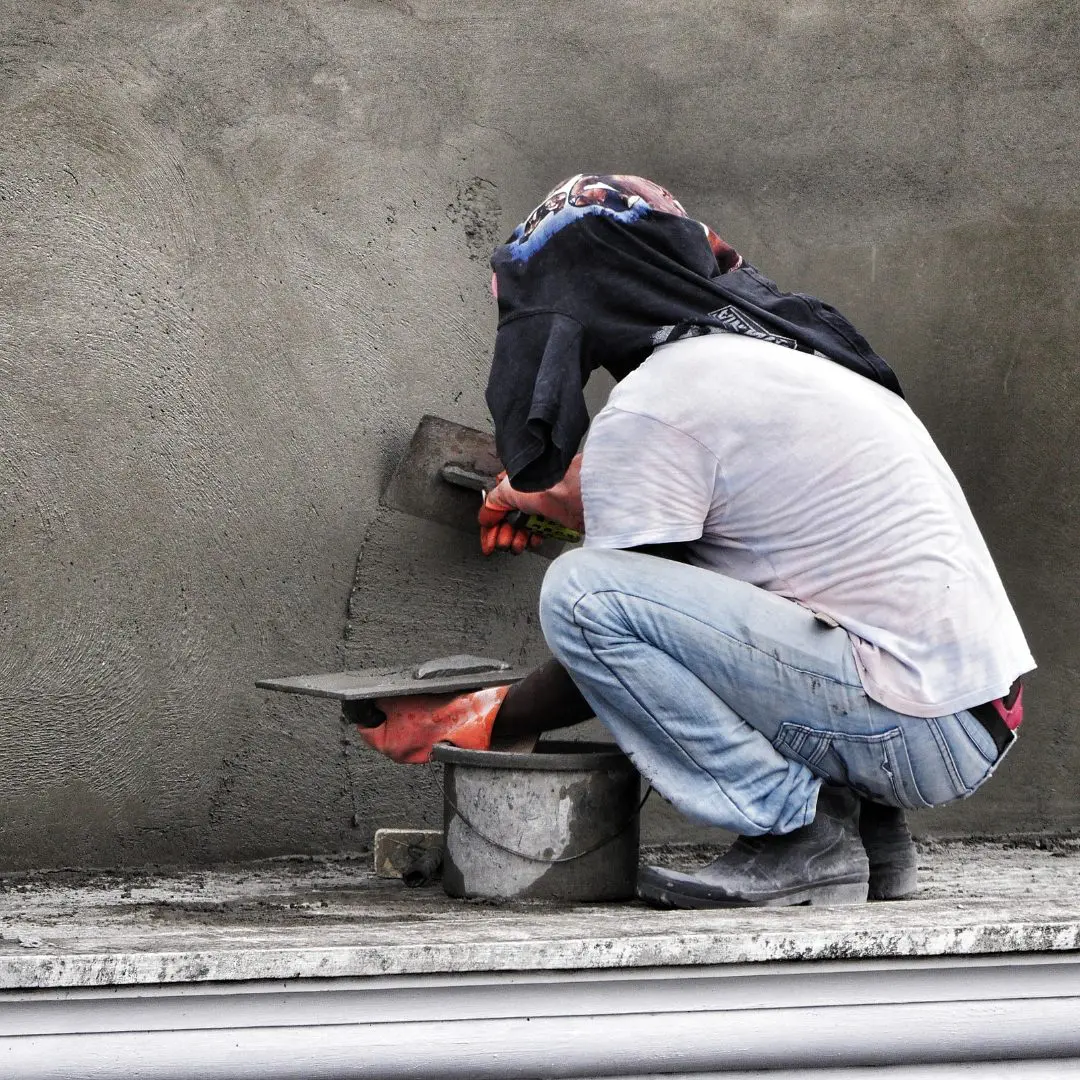
Step 5: Apply The Parging Cement
Now comes the fun part! Use a trowel or hawk:
Aim for an even thickness across all areas being repaired.
Step 6: Finishing Touches
After applying cement:
- Texture can be added if desired using various tools like sponges or brushes.
- Allow drying according to product guidelines before painting if needed.
Adding texture can enhance aesthetic appeal while also helping hide imperfections underneath.
Common Mistakes During Parging Repair
Even experienced DIYers make mistakes occasionally! Here are common pitfalls to avoid during your repair project:
Avoiding these errors will help ensure a smoother repair process!
Parging vs Stucco: What’s The Difference?
While often confused, parging is distinct from stucco in several ways:
| Feature | Parging | Stucco | |----------------|---------------------------------|-----------------------------| | Composition | Primarily cement-based | Can include sand & lime | | Purpose | Protection & aesthetics | Decorative finish | | Application | Thin coat over masonry | Thicker application |
Understanding these differences aids homeowners in choosing appropriate solutions based on their needs!
When To Hire A Masonry Contractor?
There are certain scenarios where calling in professionals makes sense:
Hiring experts ensures quality workmanship while saving you time!
Finding 'Stucco Near Me': Tips for Locating Local Professionals
Searching online isn't always straightforward; here are stucco finish types https://dependexteriors.com/contact-us/ https://dependexteriors.com/about-us/ tips on finding local stucco contractors quickly:
Getting referrals could save you time sifting through countless options!
FAQs About Parging Repair
Q1: How long does parging last?
A1: With proper installation and maintenance, parging can last anywhere from 10–30 years depending on environmental factors!
Q2: Is parging waterproof?
A2: While not entirely waterproof, properly installed parging does create moisture-resistant barriers against water infiltration!
Q3: Can I paint over freshly applied parging?
A3: Wait at least two weeks after application before painting! Ensure complete drying first!
Q4: Do I need professional help for small repairs?
A4: Small repairs can often be handled DIY-style; however, consult professionals if unsure about techniques/materials used!
Q5 : What type of paint should I use after repairing my stucco wall?
Q6 : How do I prevent future cracking in my repaired areas?
A6 : Regular inspections/maintenance—such as cleaning debris off surfaces—will go far towards preventing deterioration down road!
Conclusion
In conclusion, understanding how to perform effective parging repair is essential for maintaining both functionality and aesthetics within your home’s exterior façade! From knowing what materials are best suited through step-by-step instructions outlined above—we hope this guide serves as a comprehensive resource throughout entire process! Remember—patience plays key role while tackling these projects yourself but don't hesitate reaching out professionals whenever necessary either! By prioritizing regular maintenance alongside timely repairs—you'll enjoy beautiful durable results years ahead!
Whether you're contemplating an exterior painting project involving stucco walls or simply seeking reliable information regarding "parging repair near me"—this article has provided insights designed empower homeowners tackle challenges confidently head-on!